What preparations are needed before a floor-tiling robot arrives on site? How should the equipment and construction crew work together to achieve both quality and efficiency?
Successful robotic tiling requires coordination across substrate preparation, tile layout, material supply, equipment routes, and manual edge finishing. The following guide explains the complete workflow in the order work takes place on site.
Common floor-tiling methods include thick-bed installation using cement mortar and thin-bed installation using tile adhesive.
In developing countries, including China, thick-bed installation remains the predominant method. The industry faces growing challenges, including relatively low productivity, shortages of skilled workers, inconsistent workmanship, and untidy construction sites. These issues are driving an increasingly urgent demand for automated and intelligent construction equipment. Thin-bed installation is widely used in developed markets such as Europe and North America. Some of China’s central and local state-owned enterprises, along with leading companies, have also begun adopting it on their projects.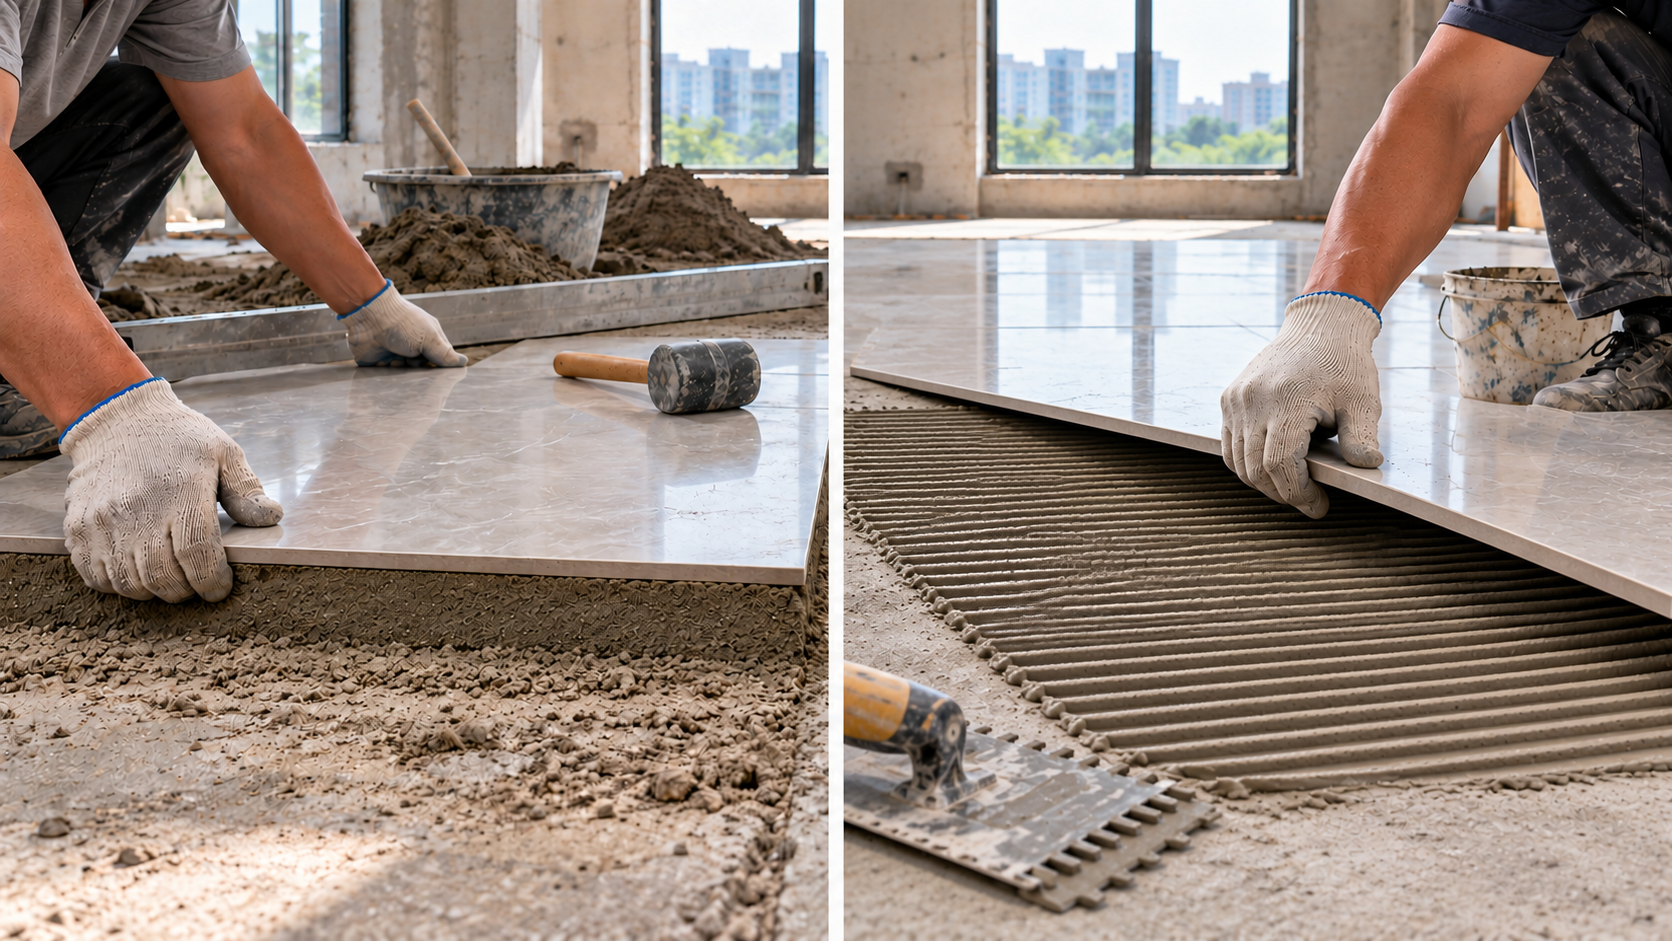
Thin-bed installation uses tile adhesive to lay tiles over a substrate that meets the required flatness tolerances. It involves simpler site procedures and a higher degree of standardization, making it easier for robots to work continuously along predefined routes. As the workforce ages, the skills gap widens, and construction becomes increasingly mechanized and automated, thin-bed installation is gradually replacing traditional thick-bed methods.
Floor-tiling robots are designed for indoor thin-bed installation and accommodate common tile sizes, including 600 × 600 mm, 800 × 800 mm, and 600 × 1200 mm. Once the vision positioning system identifies the placement location, the robotic arm and suction gripper pick up, move, and lay each tile, while the dispensing mechanism applies tile adhesive in coordination with the tiling process.
Before tiling begins, complete the handover inspection for the substrate. Check that the floor is clean and flat, with no surface dusting, loose areas, raised spots, or defects requiring repair. If the substrate does not meet project requirements, complete the necessary remedial work before proceeding.
Establish the tile installation level using the project’s common horizontal datum, taking into account the tile thickness and the specified finished floor level. Site setting-out, robot parameters, and installation thickness must all use the same level reference.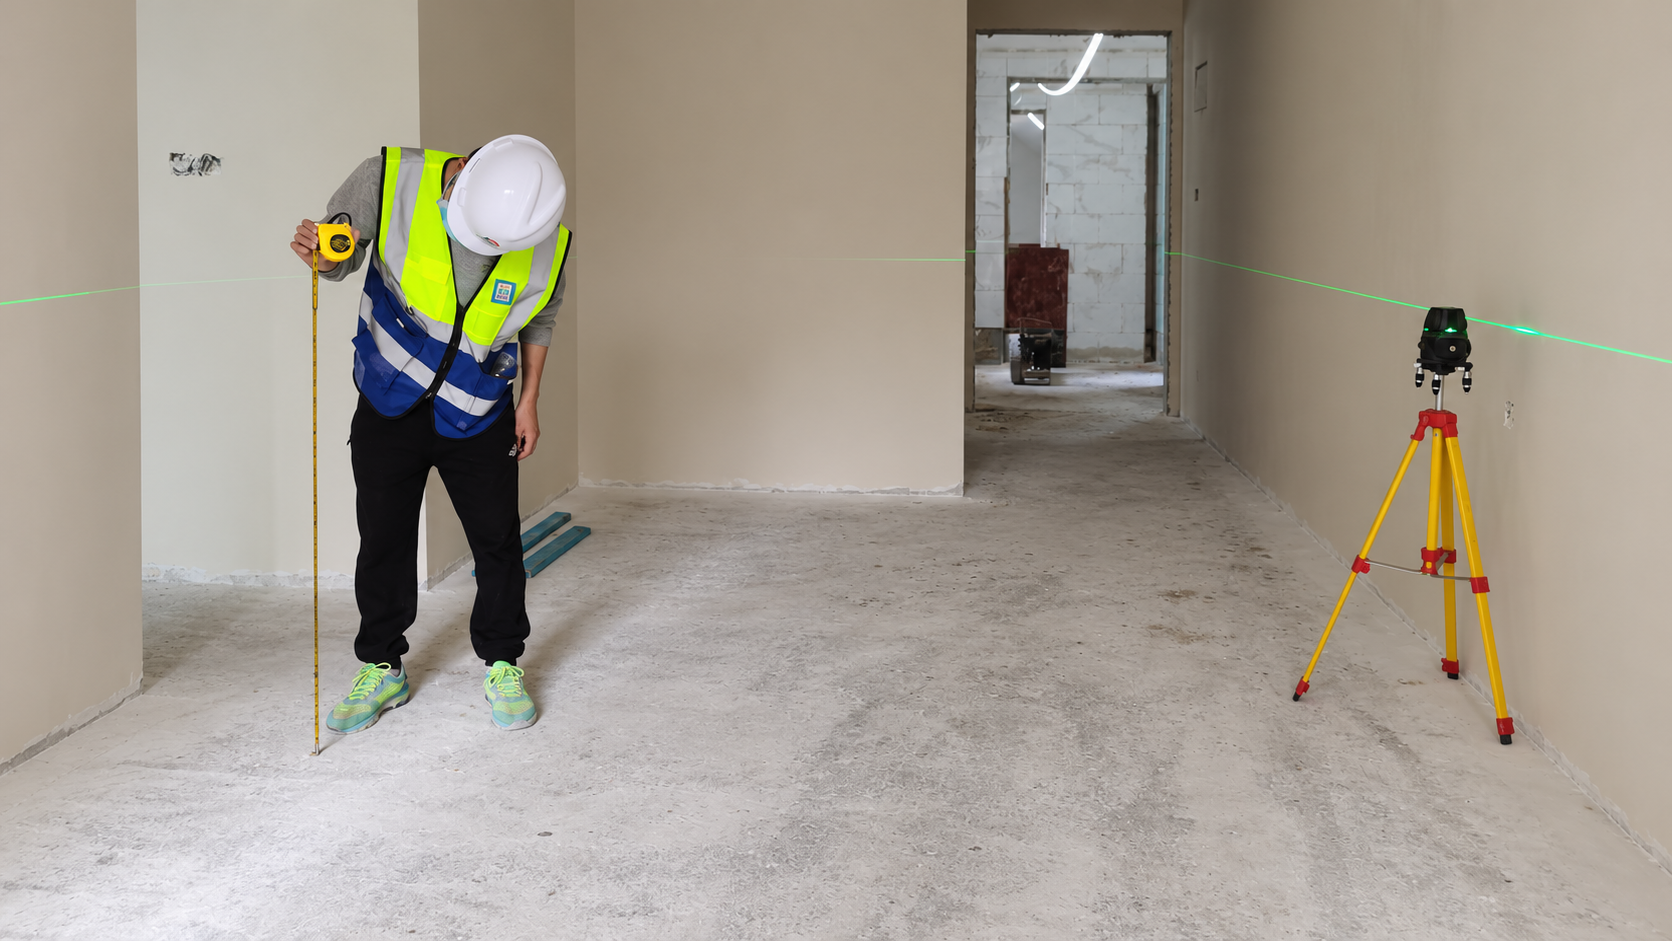
Plan the robot’s operating route in advance based on the tile layout drawing and site conditions. Room entrances, walls, columns, construction hoists, and access routes all affect equipment access, the starting point, and transitions between tile rows.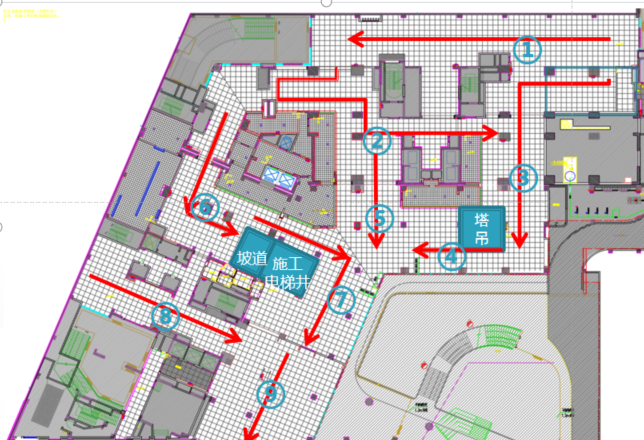
The overall route typically progresses from the interior of the space toward the exit. Minimize transitions between rows wherever possible to maintain a continuous workflow. When the robot lays tiles while moving backward, leave sufficient clearance behind it and ensure its travel route avoids completed tiled areas.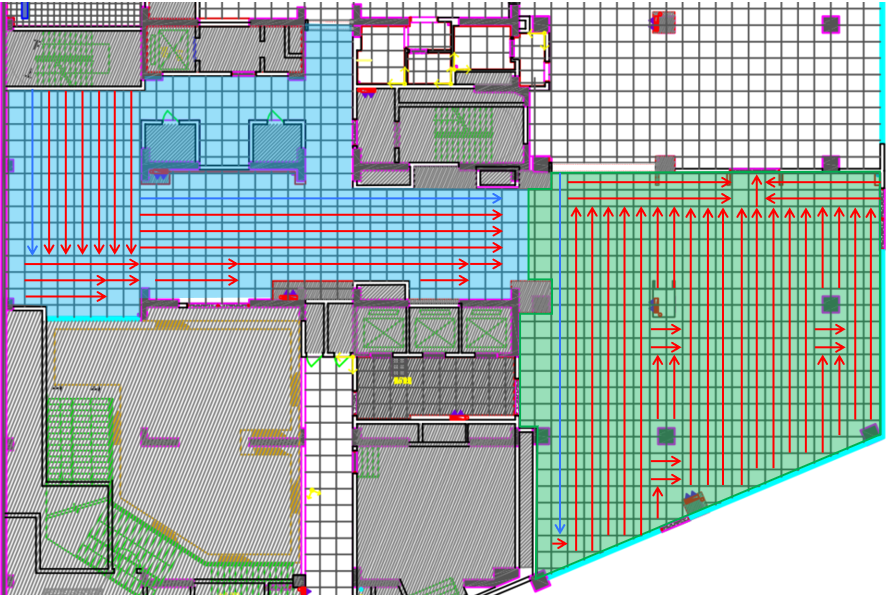
Position tiles, tile adhesive, and supporting tools near the work area in advance. Material storage locations should allow convenient replenishment without blocking equipment access or interfering with other trades. Where centralized mixing is required, identify the mixing area, water supply point, and temporary electrical supply locations beforehand.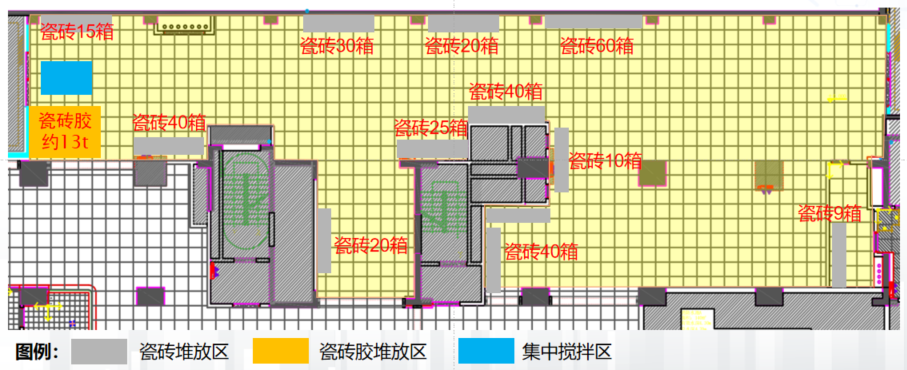
The complete workflow is carried out by a team comprising one floor-tiling robot, one application engineer, one tiling technician, and one material preparation assistant.
The application engineer checks the equipment, positions the guidance laser, and configures the tiling parameters. During operation, the engineer monitors equipment performance and assists with material replenishment. At the end of the working day, the engineer also cleans the relevant equipment components.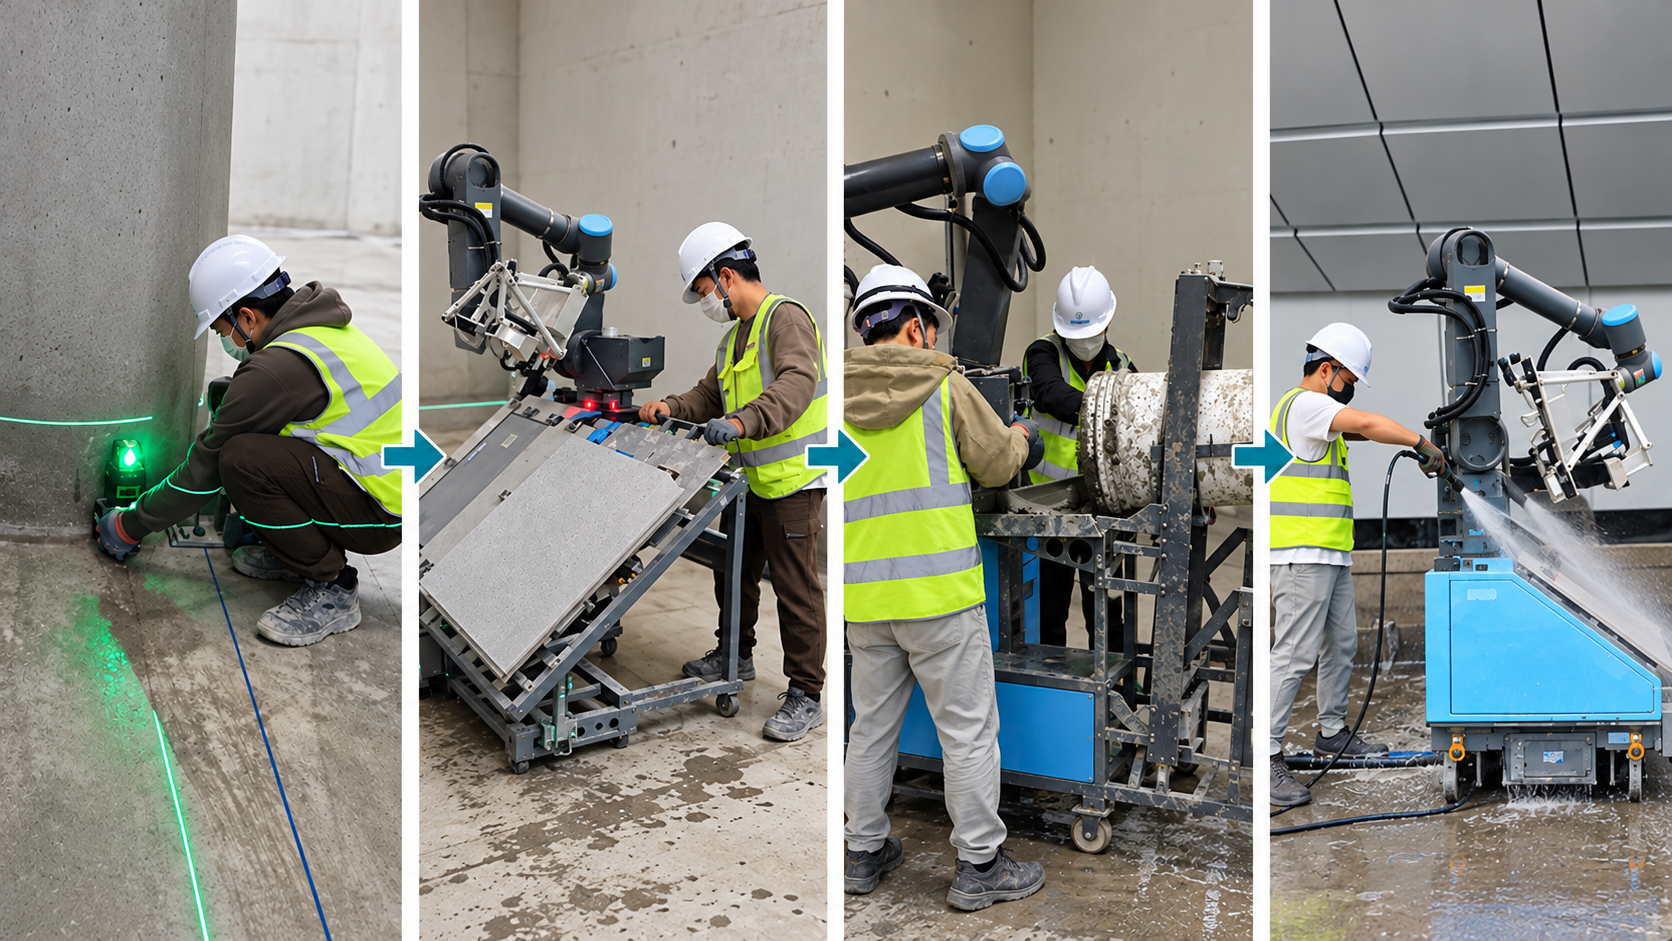
The tiling technician checks and prepares the tiles, cleans the substrate, and applies a bonding primer. Working alongside the robot, the technician makes minor adjustments to tile positions, installs tile-leveling clips, completes tiling along walls and in corners, and performs quality checks.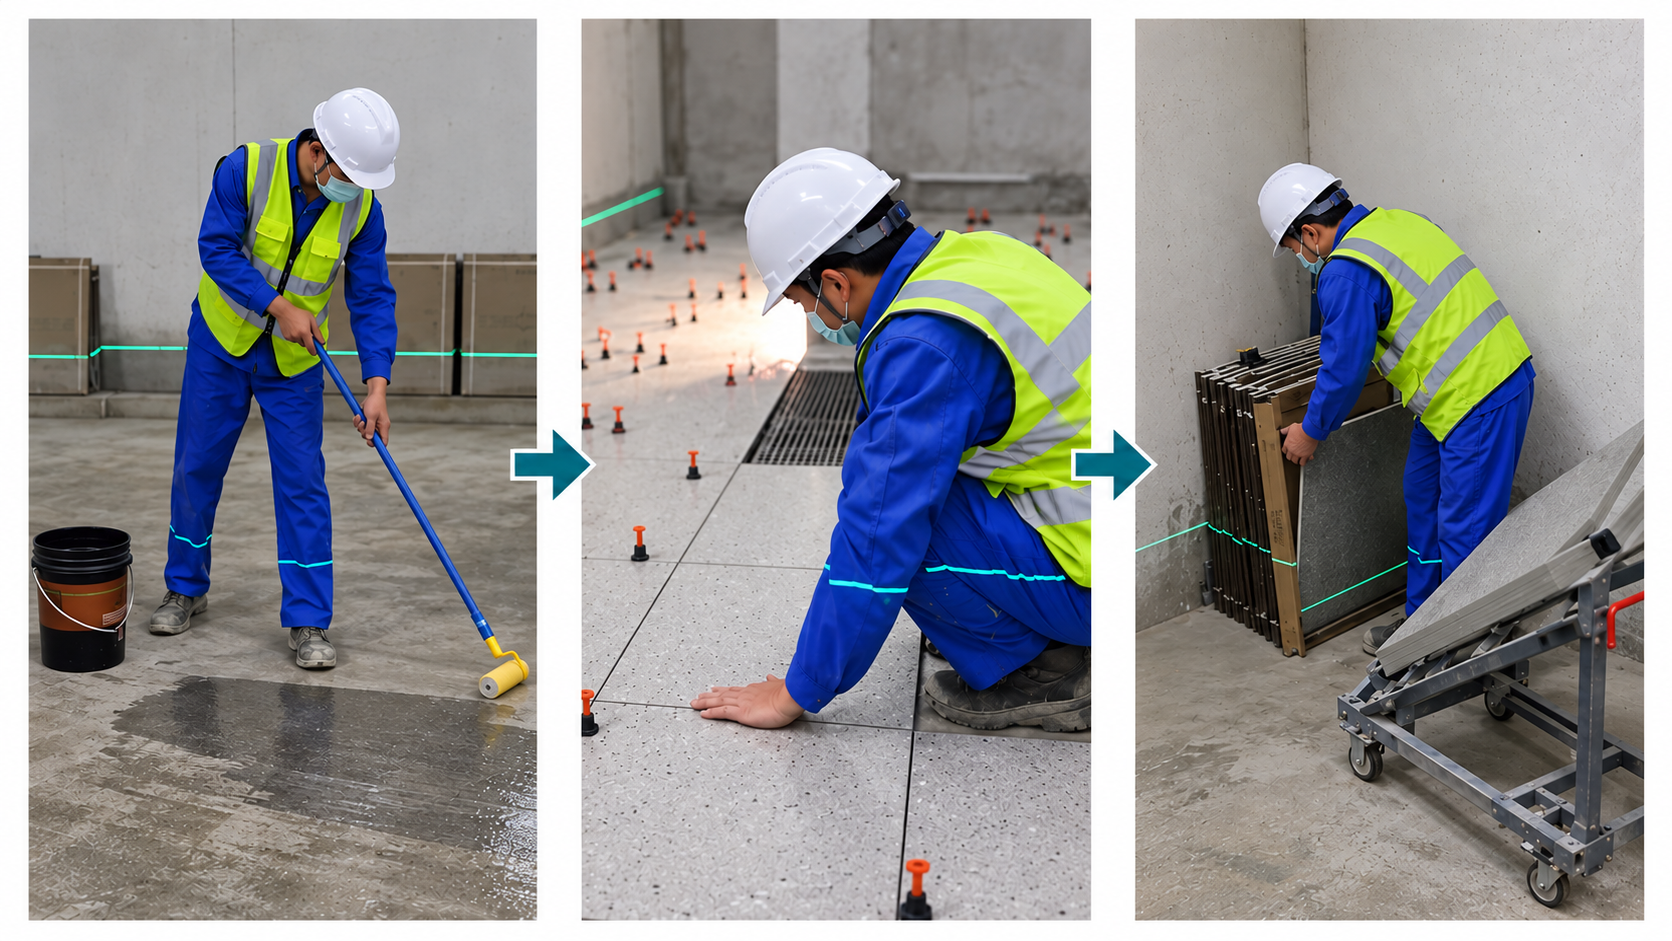
The material preparation assistant prepares the mixing and loading equipment, mixes tile adhesive according to requirements, and assists with replenishment. During breaks in the operating cycle, the assistant also prepares tiles for subsequent work.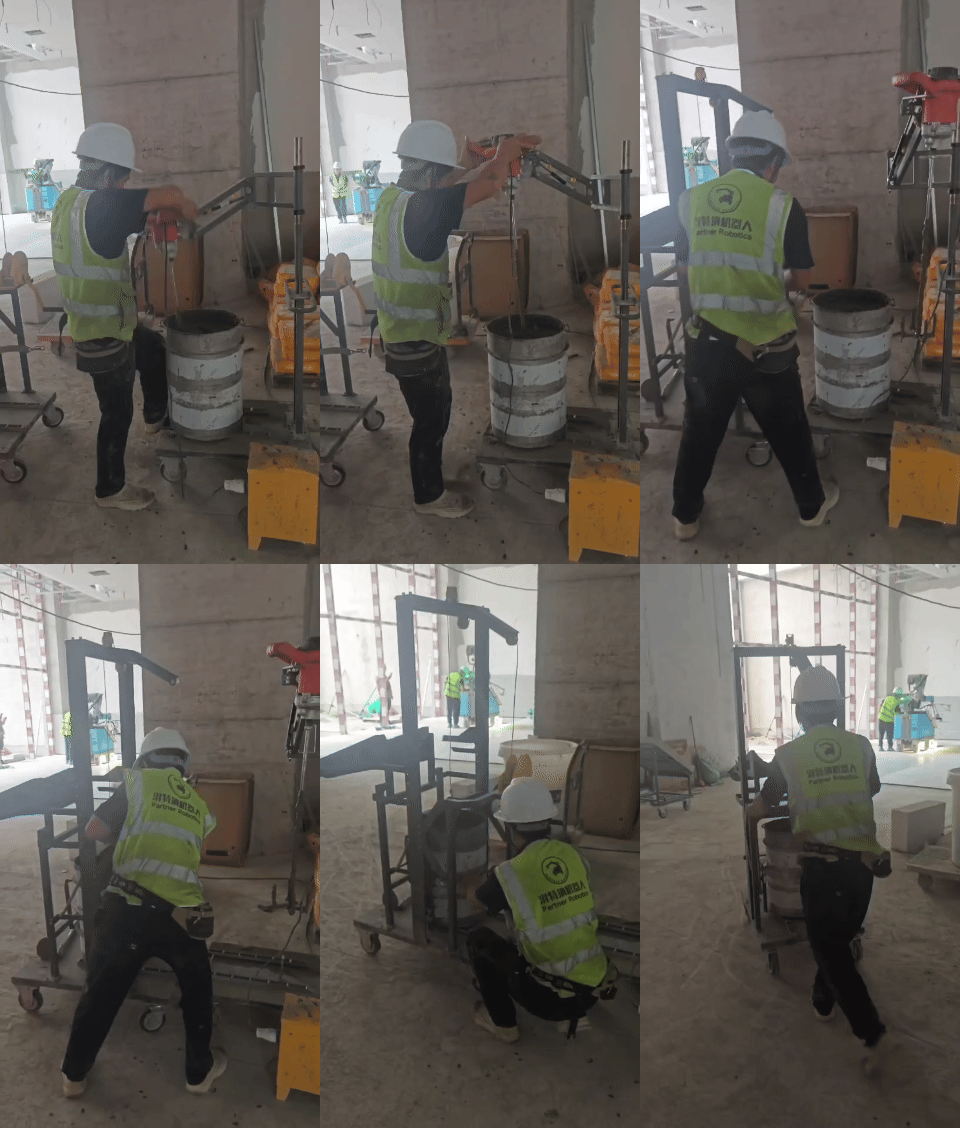
Prepare the tile adhesive according to the manufacturer’s instructions and the project’s installation requirements.
Add water first, then the powder, and mix thoroughly until uniform. Allow the mixture to stand, then remix as required by the product instructions.
Use the mixed adhesive within its specified working time. Once it has hardened, do not add water to make it usable again.
Once the tile adhesive is ready, the material preparation assistant works with the application engineer to refill the adhesive hopper. The worker responsible for tile loading replenishes the tiles using the tile-loading trolley.
Coordinate adhesive and tile replenishment with the installation pace to minimize robot waiting time.
Install the first row of tiles using the designated starting point, reference line, or laser line. Subsequent rows use the previously installed row as a reference and continue in the direction configured on site. The robot picks up, positions, and lays each tile in sequence.
During continuous operation, the application engineer monitors equipment performance and adhesive dispensing, the tiling technician installs securing clips as work progresses, and the material preparation assistant replenishes adhesive and tiles promptly.
The overall tiling task is completed through a combination of approximately 85% robotic installation and 15% manual edge finishing.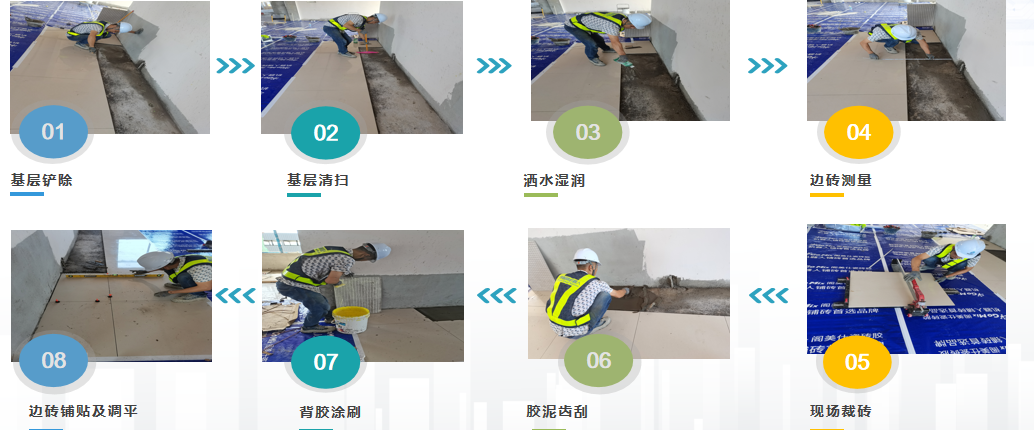
After installation, inspect the finished work in accordance with the project design documents, contract requirements, and applicable acceptance standards.
Focus on whether the tiled surface is flat, the joints are straight and uniform, adjacent tile edges have any noticeable height differences, and tile surfaces and corners are intact.
Also check the bond between the tiles and the substrate. Inspect for hollow spots, cracks, unusual sounds under foot traffic, surface contamination, and grouting defects.
For large tiled areas, compare the finished work against the tile layout drawing to verify the installation direction, layout divisions, and overall appearance. Mark and address any issues promptly.
With their speed and precision, robots improve productivity and quality across large areas. Workers contribute the flexibility needed to handle complex and irregular spaces. This division of responsibilities improves efficiency, quality, safety, site housekeeping, and construction standardization.
Partner Robotics will continue to develop its expertise in intelligent construction, refining its products and services around the practical needs of construction sites. The company is committed to providing customers with professional, reliable, and comprehensive construction robotics solutions, helping the industry move toward safer, more efficient, and smarter construction.
The purpose of robots is to reduce the physical demands on workers rather than replace them. Through standardization, digitalization, and human–robot collaboration, construction quality and operational efficiency can improve together.


